+N Consulting, Inc.

Better Cosmos DB Cost Sharing

Until recently, Cosmos DB’s pricing model was based on a per-collection provisioning. This model was a good fit for single-antity applications using Cosmos as a flow-through data point collection or other narrow well defined collection usages.

But for applications spanning multiple entities with broader usage pattern this could prove cost prohibiting: Each document type or entity would have naturally been designed to go into its own collection. But with the minimum price for the smallest collection around $30 a month for 400RU, an enterprise would think twice before designing an application that used Cosmos as a full back-end because low-usage collection data would start adding up to the solution cost. If nothing else, this pricing strategy flew in the face of the code-first benefits which document oriented databases promise.

Worst, this pricing lead some to use a single collection for all entities of all types. While that move saved money by not over-provisioning collections for small infrequent documents, it fosters no separation of concerns and did not promote separation of concern in code as microservices would have otherwise.

Good News Everyone!

This is all in the past!

Cosmos DB now lets you provision database throughput at the database level. Collections created under that database will then share the cost based on that provisioned RU level. You can still provision specific collections with specific RU to meet your needs. But if you do not, then all the collections in that database will share the provisioned throughput.

To do this, you will start with creating a Cosmos DB account. Once an account is created, you can go to the data explorer and then hit the “New Database” link at the top.

Create Database

In the dialog, type the name of your database, and check the “Provision throuput” checkbox.

Provision Throughput

This will reveal a secondary input where you can enter the desired throughput. The minimum provisioning is 400RU, but the default number popping in that box is 1000RU. Choose the throughput level your application demands - that’s something you have to determine on your own.

Choose RU

That’s it! Collections created under the shared throughput will share the cost and throughput at the database level. No more kludge code to force all documents of all types into one collection. No more skimping on collection creation for low-volume / low-frequency data to save a buck. Sharing the throughput let your architect and code your application without weirdness coming from the pricing model.

Kudos to the team that made this possible.

Transactions with MongoDB 4.0 and .Net

Multi-Document Transactions and MongoDB

TL;DR - MongoDB 4.0 supports multi-document transactions!

When you have 2 mutations (write operations), each affecting 1 document, Mongo used to apply each write as an independent commit. Consequently, there was a point in time in which mutation 1 was applied but 2 was not. If 2 failed for whatever reason, 1 was still applied.

This behavior caused some pain in attempting to manage all-or-nothing style operations which affect multiple documents. For example, if you had to lend a book to a person you might have wanted the bookmarked as lent-out, and the library visitor to have the book appended to their lent-out list.

If marking the book succeeded but marking the visitor failed, then the book is lent to no one. If marking the visitor first and failing to mark the book as lent, it can be double-lent. Further, there is a point in time in which the visitor “has” the book, but the book is not yet “held”.

Now, there are potential structural solutions to this problem in a document-oriented world, but let’s go with transactions. The newly available transaction support lets you wrap a transaction around the 2 operations. I like thinking of a Mongo transaction in terms of visibility:

  • Before the “begin-transaction”, other readers see data as it was.
  • During the transaction’s lifetime, other readers see data as it was. Mutations happening during the transaction are not visible to readers (*there are some choices here, more on that in a bit..)
  • After the transaction commits, other readers see the results of all mutations.

Speaking of visibility, one of the core changes that needed to occur in the Mongo engine is marking OpLog entries with a global logical cluster time. Why is that important? Because transactions are really about controlling the visibility of written items across the Replica Set. The implementation of point-in-time reads is another key piece of the puzzle. This feature provides a view for reading such that the document states visible to the reader are of the same version they were when the read operation started. Modifications occurring during a long-running operation would not be exposed to the reader, so a consistent view is ensured.

To scope several operations into a transaction, Mongo relies on the already available session implementation. Sessions existed in 3.6, so the leap is smaller. A session groups a sequence of commands, and is tracked throughout the cluster. It is therefore already suitable for the notion of a transaction. All that was added is a syntax for a developer to pass along a session into the commands themselves. All method signatures that mutate data now accept a session handle in the latest official drivers. From a client perspective (using a supported driver version), creating a transaction looks like:

  1. Create a session.
    1. Issue some CRUD operations with the session handle.
  2. Commit the session.

Mongo will control the visibility of the constituent operations according to the session settings.

Consider this session initiation C# code:

Demo code based on .Net driver mongodb.driver version 2.7.0

using (var session = client.StartSession())
{
session.StartTransaction(new TransactionOptions(

readConcern: ReadConcern.Snapshot,

writeConcern: WriteConcern.WMajority));

...

A few things are readily apparent from this small code structure.

A session is a disposable object, so proper disposal is guaranteed by a using claws.

A session by itself is not a transaction. We explicitly start a transaction by calling the StartTransaction() method. Within a session, only one transaction may be “live” at a given time. Since we are within a using scope, this code has a low risk of breaking that rule.

TransactionOptions describe 2 key parts of the transaction treatment: read and write concerns. The write-concern describes the durability expectation of the mutations. Just like any Replica Set write, it lets us control the risk of roll-back of individual writes in case of primary transitions or other adverse events.

The read-concern describes the visibility mode of the mutation during the transaction- the time between the start and the would-be commit or abort commands. As mentioned earlier, what happens during the transaction lifetime before it is finished - successful or not - is really what transactions are about.

The particular setting of ReadConcern.Snapshot, when paired with a write-concern WriteConcern.WMajority guarantee that any reads occurring as part of a transaction view data that is majority committed. Those reads are “stable” and should not roll back since the majority of nodes already have applied that data. You might be tempted to use a weaker read-concern such as ReadConcern.Local or ReadConcern.Majority for sake of speed. That choice may not be treated as you expect. For one, Mongo might “upgrade” the concern to a higher one such as snapshot. Further, Mongo does not guarantee that the writes won’t be rolled back in the face of cluster adverse events. In case of a rollback, your whole transaction might be rolled back so what’s the point really?…

Snapshot

Snapshot is a read-concern relating to read-your-own-writes and causal consistency. Causal consistency describes a relationship between operations where one causes the other: A read operation returning the value of filed count right after a write operation setting count = 123 expects the count to be 123. The write preceding the read caused the mutation and the reader expects the write to be “the one caused by the preceding operation”. An implied order is what this is about. As mentioned before, one of the underpinnings of transactions is a global timestamp, allowing a strict order of operations. Within a causally consistent session, pure read operations following a write is guaranteed to see the results of that write. It may seem trivial - desirable certainly - but keep in mind that other concurrent writes may occur during your sequence which may affect the state of a document. Causal consistency assures that the state of a read document following a write is seen as that writer’s result.

In the diagram below, a session with causal consistency ensures the reader sees the results of its preceding write. A session with no causal consistency does not ensure that, and depending may result in Client One reading a document modified by Client Two rather than the result of Client One’s own write.

With and without causal relationship

The default for creating a session is to create it with causal consistency. The code below creates a session with the default value or explicit option. Either of these result in the same.

// setting CausalConsistency explicitly
using (var session = client.StartSession(new ClientSessionOptions { CausalConsistency = true }))
{ ...

// setting CausalConsistency implicitly
using (var session = client.StartSession())
{ ...

Now we can state this: A transaction in a causally consistent session with a read-concern of “snapshot” and write-concern of “majority” containing reads, will view documents committed to a majority of the nodes. This guarantee level extends to reads within the transaction such that not only will the transaction writes succeed if majority acknowledged, but the reads within the transactions will also only rely on majority committed documents according to the snapshots time. This shuts down the concern of having a transaction rely on document state which might be rolled back because once majority-committed, it won’t be rolled back. This provides a consistent view since the causal consistency kicks in and guarantees that.

Code it Up

The theory above gives us the background necessary to understand what’s going on. The code below implements a multi-document transaction touching 3 documents across 3 different collections.

The scenario is that we have some Tool which can be borrowed by some Person and is then logged in the LendingLedger. We start by creating a new session. We then perform the sequence of operations inside the transaction:

  1. Mark the tool as held by the person.
  2. Check that the tool was indeed found and marked.
  3. If the tool is not found to be un-held, or if not found at all or update failed we’ll throw an exception, which is then caught and aborts the transaction.
  4. Add a ledger entry detailing the tool, person, and time the tool was lent out.
  5. Increase the number of tools the person has by 1.

Under the cover of a transaction, performing this sequence gives us assurance that all three entities would be manipulated to satisfaction, or rolled back completely. Further - other concurrent operations in parallel would not interfere with the operations happening inside this transaction.

For a more complete demonstration please see my GitHub repo.

using (var session = client.StartSession(new ClientSessionOptions { CausalConsistency = true }))
{

session.StartTransaction(new TransactionOptions(
readConcern: ReadConcern.Snapshot,
writeConcern: WriteConcern.WMajority));

try
{
var personCollection = db.GetCollection<Person>(nameof(Person));
var toolCollection = db.GetCollection<Tool>(nameof(Tool));
var lendLogCollection = db.GetCollection<LendingLedger>(nameof(LendingLedger));


var holdTool = toolCollection.UpdateOne(session,
Builders<Tool>.Filter.Eq(t => t.Id, toolId) & Builders<Tool>.Filter.Eq(t => t.HeldBy, null),
Builders<Tool>.Update.Set(t => t.HeldBy, personId));

if (holdTool.ModifiedCount != 1)
{
throw new InvalidOperationException($"Failed updating hold on tool {toolId}. It might be held or non-existent");
}

lendLogCollection.InsertOne(session, new LendingLedger
{
ToolId = toolId,
PersonId = personId,
CheckOutTime = DateTime.UtcNow
});

var toolCount = personCollection.UpdateOne(
session,
Builders<Person>.Filter.Eq(p => p.Id, personId),
Builders<Person>.Update.Inc(p => p.ToolCount, 1)
);

if (toolCount.ModifiedCount != 1)
{
throw new InvalidOperationException($"Failed updating tool count on person {personId}");
}
}
catch (Exception exception)
{
Logger.Error($"Caught exception during transaction, aborting: {exception.Message}.");
session.AbortTransaction();
throw;
}

session.CommitTransaction();

}

Epilog

Transactions have been long awaited by some for quite a while. Others see transactions as a performance and scalability hindrances, placing an undue burden on the core engine. There are performance implications to transactions. Measuring those is tricky because the effect depends on concurrency, velocity, and size of data. Transactions also introduce more controls on timing, with defaults favoring quick transactions and opting to abort rather than consume precious resources. How much overhead will a transaction introduce? I don’t know - better measure it. The documentation currently states only a vague warning:

…In most cases, multi-document transaction incurs a greater performance cost over single document writes, and the availability of multi-document transaction should not be a replacement for effective schema design …

Certainly, something to consider, and I for one definitely model entities with the mindset of embedding where appropriate. After all - if you want completely “independent” entities with cross-references, there’s an app for that… We chose a document-oriented-database for its document-oriented nature - let’s leverage that. A good rule of thumb is that if your RDBMS schema was translated into one-collection-per-table in MongoDB - try again.

Lastly, I should mention that the v4.0 release includes multi-document transactions on replica sets but not on sharded collections. Support for sharded collections with transactions is slated for V4.2.

Happy transacting!

The Good, the Bad, and the Join

When modeling in the document-oriented world, One to few relationships are often modeled as arrays embedded in the containing entity. Sometimes the relationship is one to many, or such that an embedded array would not work well. In those cases, the need for some sort of JOIN comes up.

The Aggregation Framework in MongoDB gives us a convenient option: $lookup! But $lookup is not JOIN - at least not the one we are familiar with from SQL and relational databases. This distinction is important to understand, as it may affect your modeling and performance.

What $lookup Is

$lookup queries a second collection for each document entering the pipeline stage. Any documents from the secondary collection that pass the lookup condition are attached to an array field on the entering document.

The behavior differs from SQL’s INNER and LEFT JOIN in its geometry. In SQL a row is emitted for each match of the right table, and produces a wide row with all columns from the left and all columns from the right - flat. Rows in the left table that had no match in the right table would not be produced at all. Similarly, a LEFT JOIN would have produced flat rows, and a NULL filled row for the right table in case no match was found for the right table.

The behavior also differs in the DDL aspects and expectation. MongoDB does not represent or maintain any kind of foreign key relationship between collection. While relational databases expose foreign keys in the DDL and extend them with things like cascade-delete and insert/update validation of key existence, MongoDB has no such constructs.

Apart from the geometrical and DML-only nature of $lookup, it is also a bit more limited. You cannot lookup into a collection that is sharded. This limits the scale of the database where one could apply the syntax, and should give you pause to think through your modeling carefully before relying on this syntax.

The closest analog of $lookup to SQL JOIN varieties is the LEFT OUTER JOIN.

Simulating INNER JOIN

At times, we want to simulate INNER JOIN. We may want to emit only documents from the first collection which have one or more match from the in the second collection.

There’s a way to do this using aggregation by chaining $lookup and an $unwind.

Full props to Asya Kamsky for this technique!

The subtle point is that $lookup appends an array of values from the second collection for each input document, and an empty array if no match is found. That empty array is the key to this solution. $unwind has the ability to suppress emitting documents where the array field is empty or missing. In fact, that was the default behavior of $unwind all along.

Consider the following data sets:

db.cities.insert([
{ "_id" : "PIE", "name" : "St. Petersburg", "state" : "FL" }
{ "_id" : "YUM", "name" : "Yuma", "state" : "AZ" }
{ "_id" : "TOL", "name" : "Toledo", "state" : "OH" }
{ "_id" : "FAR", "name" : "Fargo", "state" : "ND" }
]);

db.routes.insert([
{ "_id" : 1, "departure" : "PIE", "arrival" : "YUM", "d" : 90 }
{ "_id" : 2, "departure" : "PIE", "arrival" : "TOL", "d" : 60 }
{ "_id" : 3, "departure" : "FAR", "arrival" : "YUM", "d" : 40 }
{ "_id" : 4, "departure" : "YUM", "arrival" : "TOL", "d" : 50 }
{ "_id" : 5, "departure" : "TOL", "arrival" : "FAR", "d" : 30 }
]);

Now query the cities to discover the inbound flights arriving in for each city. For each city, a list of routes is appended from the routes collection. The match is on the cities _id field against the routes arrival field, both of which contain the FAA 3 letter airport code.

    {
$lookup: {
from: 'routes',
localField:'_id',
foreignField:'arrival',
as: 'inbound'
}
}
])

The result for Toledo (‘TOL’) will show 2 inbound flights:

{
"_id" : "TOL",
"name" : "Toledo",
"state" : "OH",
"inbound" : [
{
"_id" : 2,
"departure" : "PIE",
"arrival" : "TOL",
"d" : 60
},
{
"_id" : 4,
"departure" : "YUM",
"arrival" : "TOL",
"d" : 50
}
]
}

The result for St. Petersburg (PIE), will contain no inbound flights - an empty array. This is because there is no route with an arrival into it.

{
"_id" : "PIE",
"name" : "St. Petersburg",
"state" : "FL",
"inbound" : [ ]
}

This behavior simulates an SQL LEFT OUTER JOIN. But we want to simulate an INNER JOIN. This is where $unwind comes in. Since version 3.2, $unwind includes the preserveNullAndEmptyArrays option. When true, documents containing empty arrays in the $unwind field will be emitted from the stage. When false, documents entering $unwind with an empty array or missing field will be suppressed - won’t be emitted. The default value of preserveNullAndEmptyArrays is false. So we can actually use the simplified backwards compatible syntax:

db.cities.aggregate([
{
$lookup: {
from: 'routes',
localField:'_id',
foreignField:'arrival',
as: 'inbound'
}
},

{
$unwind: '$inbound'
}
])

This time, St. Petersburg (PIE) will be suppressed, because it had an empty array. Simulated INNER JOIN done! In addition to effectively simulating the INNER JOIN, this technique produces a geometry that matches the SQL counterpart a bit closer. The result documents after $unwind contain a “flat” one-to-one document with all fields from the first collection and all fields from one document from the second collection (albeit demoted one level into the inbound field).

Not Full Parity

Relational databases expose 4 varieties of JOIN: INNER, LEFT OUTER, RIGHT OUTER, and FULL OUTER.

A RIGHT OUTER JOIN is just a LEFT OUTER JOIN, but on the opposite collection, right? Well, not exactly. First, the limitations for $lookup with regards to sharding might prevent you from enjoying full symmetry. Second, you might need to “join” in a late pipeline stage, after a few manipulation of the first collection. In that case - again - it may be either difficult or impossible to reverse the roles of the 2 collections. Consider for example collection A that you use a $text match on, and want to leverage the full text index for filtering. Reversing and aggregating on collection B will prevent you from using the same index effectively.

FULL OUTER JOIN is flatly not supported by $lookup. It would be difficult to implement at scale, and would obviously collide with the sharding limitation on one of the collections involved. Performance questions aside, one would also need to consider the meaning of a pipeline - the basis of the aggregate() command. The pipeline feeds documents from the previous stage or a collection into a given stage. Under no circumstance do all documents from 2 separate collection enter into a stage. $lookup is designed to bring in a subset of matched documents from a different collection, not all documents from a second collection. It may be tempting to simulate a FULL OUTER by using uncorrelated sub-query within the $lookup syntax, using a pipeline option that effectively drags in every document from the second collection. This will attach an array of every document from collection B into an array on every document from collection A. Ouch! Even if this worked, you’d surely need to chase this with a $group or similar operator to get distinct values somehow. But very likely the pipeline will abort: The memory impact on the stage will be arbitrarily large. Finally, and even with allow-disk-usage, the document size limit of 16MB applies. So if collection B has more than 16MB, it will fail. If both collections are sufficiently small, an application-side join might be your best bet. Application side join is not very efficient, but can be acceptable for small-ish collections such as metadata type documents.

In general though, taking SQL operators and hoping that MongoDB or the Aggregation syntax would provide full parity is perilous. Taking the time to analyze the actual use cases and modeling properly using Document Oriented techniques would lead to better performance and cleaner designs.

Easy Development Experience: VS Code CosmosDB / Mongo explorer

It’s nice when you can develop code and explore your database in the same development environment. It’s even nicer when it’s VS Code, where I spend a lot of my time these days.

Since I’ve been working with both MongoDB and CosmosDB for various projects, I found using the MongoDB driver a big productivity boost, and pointing it to my database (either CosmosDB or a MongoDB) a convenient boost, eliminating the constant flip between shells, apps, and mindsets.

The trick is to install Cosmos DB Support for VS Code extension in VS Code. Once installed, it enables another icon on the VSCode activity bar.

Connecting

Azure sidebar 
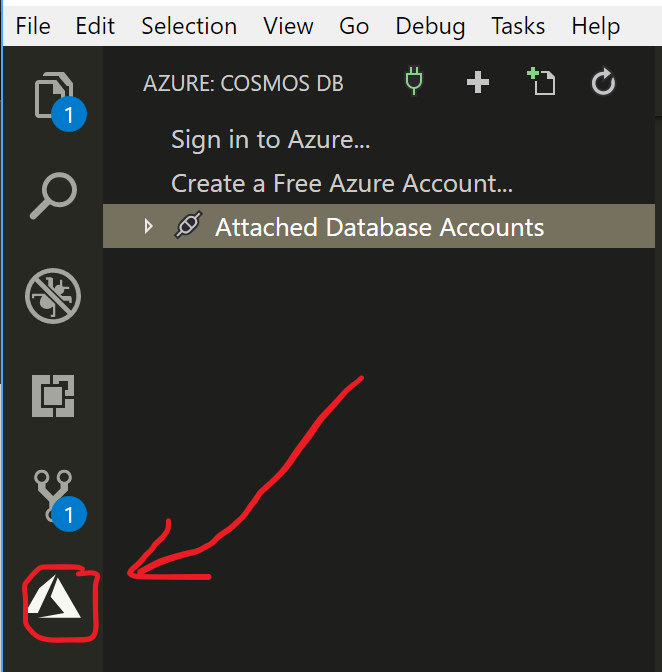
Expanding that side bar gives you a tree view for the databases (yes, plural: you can have several connected at once).

To connect to a database using connection credentials, you invoke the CosmosDB: Attach Database Account command. Next, VSCode will ask you which interface you would like to use.

DB Type

This is the great part: If you want to connect to a native MongoDB server, choose MongoDB as the interface, then paste in any* valid MongoDB url!

DB Type

Although the extension is labeled CosmosDB all over the place, it uses the MongoDB driver for making MongoDB API connections to CosmosDB instances that have MongoDB API enabled. This means it works just as well for native MongoDB databases!

If connecting to a CosmosDB instance, the easy connection option is to attache by signing in to Azure. Hit the “sign in to Azure” link. This will pop up a toast notification in VS Code, telling you to open a browser and enter a nonce code into the web page prompt. The web page will then let you log in to Azure, and once that’s done you can close the browser. If everything went well, a list of your Azure subscriptions under that account will appear in the tree view. While this option is nice and true to Azure account provisioning form, it is not always a good fit for development shops that provision connection string based credentialed access, but don’t allow developers direct portal or azure resource access beyond that.

Data Interaction

Once connected, you can see a listing of databases and collections in the tree view. To see some documents, double click a collection name. A listing of documents will appear in the tree view.

Double a document, and you will see its JSON representation as a docked tab, letting you visualize the document content with full JSON, outlining, and extended type support. Extended JSON represents the underlying BSON native types with full round trip fidelity.

{
"_id": {
"$oid": "5acbc21497c5242f8aba10b5"
},
"name": "bob",
"born": {
"$date": "2018-04-09T19:42:12.497Z"
},
"balance": {
"$numberDecimal": "3.14159265"
}

}

In the above document sample, the field _id contains an ObjectID type. Extended JSON writes it as an encapsulated value using the $oid field name. Similarly, the field born is assigned a BSON date type, represented with a $date value field containing a canonical string date representation. This is an important thing when you deal with money for example, so that the decimal resolution and math operations on the field would be correct, which is why you should use $numberDecimal - a high precision decimal - rather than a double data type.

Document Editing

When you open a document to view its content, you actually created a Document Tab. These tabs let you modify the single document using the full power of the IDE. JSON linting, outlining, formatting, syntax highlights - all those help you visualize and understand your document better. But you can also make modifications to the data! You can change fields and their content to shape the document to your liking. When done, you can update the source database 2 ways:

  • Using the Update to Cloud button
  • Using the File-> Save command ([CTRL] + S)

If you use the Update to Cloud button, the update will be carried out, and an output log line in the Output tab for the CosmosDB category will be revealed, showing the DB, collection name, and document id in URI-like format

update document button

10:49:12 AM: Updated entity "127.0.0.1:27017 (MongoDB)/db1/peeps/5b1eb2127f0f232ac43e0f42"

If you use the File->Save method, a toast will appear first, to make sure you actually meant to update the database.

save warning toast

The subtlety is that you may have inadvertently requested saving all documents - including the edit - but do not want to actually update the database. This can prevent some class of accidental modifications. You do have the choice to dismiss these warnings by choosing the Always upload button on the toast.

Beware that when you “Update to Cloud”, the content of the document in the tab will completely replace any and all values in the target database. Fields that exist in the database but not in your tab will be removed. If anyone else made changes to the database since you loaded it into VS Code, those changes will be gone. MongoDB provides “patch” like surgical updates, touching individual fields, but those are not available in single document update.

Scrapbook Support

Unlike the single document tab, Scrapbooks let you perform arbitrary Mongo shell commands against a connected database. This is where you have more control over updates, and can perform several operations rather than just slam update a single document. Contrary to the ephemeral connotation of the name “Scrapbook”, they can actually be persisted. Saving a scrapbook creates a new file in your root folder of the project, with the extension .mongo.

To get a scrapbook started, either choose the “plus-document” icon from the tree view banner, or invoke the VS Code command “Cosmos DB: New Mongo Scrapbook”.

New scrapbook

This will prompt you to connect anew, or choose an attached instance.

Select attached

Choosing to select an already attached instance, will further list the currently connected instances.

already attached

Choose one of those, and you’re presented with a listing of the databases.

choose db

Choose a database (or create a new one), and you’re in business!

The scrapbook surface is a persisted file containing MongoDB shell commands. Because it is persisted in the file tree, you can save it, edit it, and most importantly: version it! Source control is a great way to ensure your scripting of data access tasks is durable, repeatable, shareable and maintainable.

With the scrapbook, you are not limited to touching one document. Updates can span multiple documents using the update() or updateMany() collection syntax, and bring you the full power of advanced update operators like $addToSet, $inc etc. Any other shell command is available, so you can also remove documents, insert some, write some light javascript code to fetch and manipulate - anything you need.

Below, I scripted an aggregation query to find out number of orders per month in my “orders” collection. Hitting [CTRL] + [SHIFT] + ; executes the scrapbook in its entirety. (You can also execute only a portion of the code in the scrapbook: Select the code to run, and hit [CTRL] + [SHIFT] + '.)

Run scrapbook

Overall, the tight integration into a the IDE is a great convenience. I’m not ready to ditch my MongoDB shell yet, but not having to switch back and forth as much for daily simple tasks is awesome.

If you are working with CosmosDB with the graph interface, this extension lets you visualize graphs graphically. If you are working with the SQL document interface, it lets you connect in that mode as well. This extension is quite powerful, and has a much richer UI and options - certainly exceeding what its simple name suggests.


* Current extension version requires that the MongoDB url begins with mongodb://. While this works for most, it prevents using the perfectly valid prefix mongodb+srv:// used by some hosts. I submitted a pull request for this issue. Once merged, mongodb+srv:// should be usable as well.

Query Cost Estimate for CosmosDB using MongoDB Aggregation

CosmosDB offers MongoDB API access to data. This means that you should be able to take any application you wrote using the Mongo 3.4 wire protocol and point it to CosmosDB rather than a MongoDB instance. Well, kind of.. There are some caveats: Not all operators are supported, the consistency models differ, and the indexing strategy is completely different (exact details here. But other than that - Yay!

So I set out to kick the tires on the MongoDB API, against a cheap, fixed size CosmosDB instance, with the minimum - (400 RU) - allowed throughput.

Good news everyone!

It Just Works &trade;!

The decision to use CosmosDB as a managed data back end vs. MongoDB is not one you should take lightly. They offerings are not the same at all, even if the MongoDB API provides sufficient parity. One concern that always seems to come up is cost. Rightfully so: the CosmosDB pricing model is based on internal metering of Reserve Units/Second. And while the explanation of what RUs are can be clearly understood, mapping such a low level measurement to your actual workload is not as straightforward.

So how can you calculate your workload’s cost? For write operations, the cost can be easier to estimate. After all, when you insert a document, you can figure out the byte size of the document you are inserting on average, then multiply out by the rate of writing you anticipate.

For queries though, things are a bit more challenging. For one, the number of reads that CosmosDB will perform in order to satisfy your query is not necessarily known ahead of time. Even non-ad-hoc queries can net a highly variable number of documents. It depends on the indexing and the data variety your collection contains. Futher, CosmosDB may internally optimize data access such that some queries seem to have a 1-to-1 cost relation to the number of documents addressed, whereas other queries show lower cost. (I am guessing this is because internal block reads may cover multiple documents when documents are small and adjacent whereas larger ones cull form different or partial other I/O blocks. Just guessing.)

My applications typically produce queries using the MongoDB Aggregation syntax. Some drivers also produce Aggregation expressions, such as C# Linq etc. So I figured the best way to estimate the cost of such queries would be to run them and inquire as to their cost.

To get the cost of an operation, you can chase the operation with a Mongo command, like so:

db.db.adminCommand({ getLastRequestStatistics: 1 })

The admin command getLastRequestStatistics returns an object response that looks something like:

{
"_t" : "GetRequestStatisticsResponse",
"ok" : 1,
"CommandName" : "OP_QUERY",
"RequestCharge" : 2.27,
"RequestDurationInMilliSeconds" : NumberLong(3)
}

The field - and focus of this post - of interest is RequestCharge. Most importantly: your CosmosDB limits your throughput to whatever RU/s you provisioned for that collection. Therefore, summing up all operation costs in a time window gives you a decent estimate of your overall limits. Conversely, if you know your individual operation costs, you can provision appropriate throughput to match your live workload.

Great! I can issue an aggregation query to MongoDB from my Mongo shell, and then chase it with a “tell me how much was that” inquiry. But that gets tedious quickly… So I wrote this little node app. It’s a single page app that lets you type in various aggregation expressions, run them, and estimate the cost with the click of one button.

The UI lets you put in an aggregation expression (shown) or a “plain” find() query.

Enter Query or Aggregation

Then hit check to get the cost in terms of RU/s, plus a display of the result of the query. Something like this: Cost and result display

To run the app, you can just clone the source, then run:

node index.js "cosmos-connection-string"

You will want to do 2 things to the URL you get from the Azure portal as “MongoDB connection string”:

  1. The Azure provided connection string has “==” as part of the password in the URL. Replace these with “%3D%3D” - which is the proper URL encoding for the host portion of the URL.

  2. The Azure provided connection string doesn’t contain the destination database name. You should add the database name into the URL just before the query string, between the “/“ and the “?” characters. For example ...documents.azure.com:10255/mydbname?ssl=true&replicaSet=globaldb specifies using the database name “mydbname”.

More can be found here on how to get the connection string from the Azure portal.

Another thing to keep in mind is that this is only an estimate. It will vary from your actual runtime load (in either direction!) for various reasons, some of which are:

  • The number of documents in your collection changes over time.
  • The indexing state and type may differ.
  • The partitioning provided by CosmosDB spreads documents over actual storage, and that too can change over time.
  • Your queries - especially ad hoc ones composed on arbitrary fields with arbitrary values - can create vastly different queries than the ones you tested or estimated.

As always, reality checks using the actual metrics will beat any estimates produced in the comfort of your own lab. But since this little tool works using a connection string that a developer can get, it can be used even when Azure portal access is not directly available to a developer.

Push Notification Made Easy with MongoDB and GlingJS

GlingJS is a small component that lets you pump data events into the browser from MongoDB.

Imagine telling a customer lingering on a product catalog page “Hey! Someone just bought this very product!” or the animal shelter page popping up a picture every time a kitten is saved. Let your imagination run wild, you do you.

Cat Meme

The project was inspired by the recent introduction of MongoDB Change streams. Change streams are an efficient way to track changes occurring at the data level. It notifies you in real time each time a document is written or changed. You just need to specify which collection and under what data change conditions you want to get notified.

Ok, sounds lovely, but why GlingJS? Why another library on top of the node driver syntax?

  1. There’s a huge number of MEAN stack and node developers.
  2. They mostly build web applications.
  3. Real-time notification with WebSocket is better than polling or waiting for page transition.
  4. MongoDB is powering a staggering number of websites.

With GlingJS, you get real-time messages in the browser, with very little code.

Theory & Practice

First, you’d want to grab the package from NPM

npm install glingjs --save

Server Side

On the Node side, GlingJS consists largely of 2 working components: the ClientManager and Gling itself. In addition, WebSocketServerManager glues the WebSocket transport to the ClientManager

Client Manager

The client manager is the component that manages the WebSockets. It handles browser connection requests and topics. A topic is a subject that the browser might be interested in. Things like “when a customer registers” could be broadcast to the “newUser” topic. These are made up - they depend on your requirements so there’s no built-in set of hard-coded topics.

The client manager exposes a callback function broadcast(topic, message). This hook is what Gling uses to emit the database event upstream to the browser.

Your app would need one instance of clientManager, created thusly:

const clientManager = new ClientManager(config);

Web Socket Server Manager

The WebSocket Server manager is really just glue: WebSocketServerManager is instantiated to latch on to your Node http server, and attach WebSocket functionality to the Client Manager.

var webSocketServerManager = new WebSocketServerManager(httpServer, clientManager);

If your node app already has a constructed http server, you’d hand it to the component. If you are running a standalone Node instance(s) just for Gling, then you would need to set up an http server before reaching this point.

Gling

Gling is the component that deals with MongoDB change streams. It is also configuration based, so getting an instance of Gling is straightforward:

var gling = new Gling(config);

Gling exposes a function start(hook) which takes a callback matching the signature of ClientManager.broadcast.

Starting Gling looks something like:

// passing the ClientManager instance broadcast hook to Gling
gling.start(clientManager.broadcast)
.then(() => console.log('started gling..'))
.catch(reason => {
console.error(reason);
});

Gling handles all the business of subscribing to the MongoDB using the driver API, so you don’t have to.

Client Side

Browser

GlingJS uses WebSocket to perform the server side work.

Most browsers nowadays support the WebSocket standard, so no special library required.

The browser needs to open a WebSocket connection to the server, and provide the topic it is interested in.

<html>
<head>
<script type="text/javascript">
(function () {
// subscribing to 'meme-cat' topic, on host 'myservername'
var ws = new WebSocket("ws://myservername:80/gling", "meme-cat");

ws.onmessage = function (evt) {
const data = JSON.parse(evt.data);
//TODO: show data using your UI
};

window.onbeforeunload = function (event) {
ws.close();
};
})();
</script>

In the example above the web page subscribes to the topic meme-cat coming from the server myservername. Another page may subscribe to a different topic.

You might also notice window.onbeforeunload browser event, which disconnects the socket when a browser closes. It is good citizenship which helps the server clean up the server side resources and would help keep overhead low.

We mentioned topic a few times and eluded to a configuration. Let’s dig deeper!

Configuration

Listeners

For notifications to be useful, a client (web browser) would expect a few things:

  • That it gets messages it is interested in
  • That it doesn’t get messages it is not interested in
  • That the messages it receives have the field(s) it expects

The first 2 requirements really talk about the topic. The topic is pre-defined, and acts as a filter here: the browser says it wants cat memes, we’re going to send cat memes, but no dog memes.

The client also expects that certain fields are present. As a good convention, we’ll aim to have a single topic imply a set schema: all messages for a topic should have the same set of fields. Gling doesn’t enforce a schema, but by nature, it subscribes a topic to the same underlying documents, so the uniformity of those helps the browser get uniformly shaped messaged. Bottom line: your browser should expect that a single topic will receive the same type of message. It is possible to manufacture 2 different events and pump them under the same topic, but that can get really silly, and topics are free, so just come up with a new topic name.

Here is an example configuration:

var ChangeType = require('../src/changeType');

const Config = {
connection: 'mongodb://localhost:27017/gling?replSet=r1',
allowedOrigins: ['https://example.com/gling'],
listeners: [
{
collection: 'memes',
when: [ChangeType.create],
filter: { about: 'cat' },
fields: ['url','caption'],
topic: 'meme-cat'
},
//...
]
}

module.exports = Config;

Topics get created inside the listeners array. The fields control the delivery of the notifications:

Field Description
collection The MongoDB collection name
when Which type of changes we care about. This can be any of ‘create’, ‘update’, ‘remove’
filter Is a match condition. Only documents that match this condition would be returned.
fields Which fields from the document would be returned
topic Topic name

A multitude of listeners can be defined and supported by a single Node server, as long as it can handle the volume of notifications from Mongo and number of simultaneous browsers connected.

Filters can be compound expressions and include any operators that the aggregation framework supports. They are static though. Since change stream subscription is done once, you can’t keep changing the value in a match expression. That is to say, if you pass in the value {created: {$gt: Date()}}, the date compared will be the time the Node server started the process, not evaluated each time a document changes.

Field trimming is optional but allows you to shrink down the amount of data you send to the browser. This can help performance and also security. Given a Mongo document

{_id:12, name: 'bob', city:'La Paz', password: 'password123'}

You can configure fields to include only ['city','name'] and suppress data that should not be sent to the browser.

WebSocket Safety

To help protect browsers against scripting attacks, it’s best if you explicitly allow your domain(s) only. Pages on different domains would be rejected.

Setting allowedOrigins array is there for the ClientManager and your http server setup. ClientManager exposes a convenience method isOriginAllowed(thisOrigin, listOfAllowedOrigins) which does the math to figure if the current request origin should be allowed or not.

WebSocketServerManager takes care to reject origins not specified in the configuration.

An asterisk ‘*’ in the list of allowed origins will allow any origin! Use it in local development only, never in production!

Mongo Connection

The MongoDB server connection is specified using the connection field. Any legal MongoDB URI string would work. But since MongoDB Change Streams are built on the Oplog, the MongoDB server should be part of a replica set (even a replica-set of one server would do). For that reason, you should include the URL parameter replSet= to set the replica set name of your MongoDB cluster.

Conclusion

GlingJS is a simple and easy way to push notifications from MongoDB document change events directly into a browser using WebSockets. A demo project can be found here. The first part sets up an http server. The code to actually set up Gling and the ClientManager is minimal and simple. Check it out, see what you think!

MongoDB Change Streams - More event processing, less queue infrastructure.

What are Change Streams?

Change streams are a new way to tap into all of the data being written (or deleted) in mongo. Using change streams, you can do nifty things like triggering any reaction you want in response to very specific document changes.

For example, you have a user that registers to your website. You want to send them an email, or maybe put them on an on-boarding campaign. Maybe both? Using change streams you can hook into the live event itself - insert of a document to the Users collection - and react to that by immediately pinging your remarketing system with the details of the new user.

The flow looks something like this:

Simple Integration

Your website code only worries about registering the new user. Want to also send the new user a gift? No problem: have the listener also ping the warehouse. Want to add the user to your CRM system? You guessed it: just add a hookup.

Now you may wonder “Why this is news? Didn’t mongo always have tailable cursors? Can’t we just tail the oplog and do the same?” Sure we can. But when you tail the oplog, every mutation is going to be returned to you. Every. Single. Write.

Consider a moderate website, say 1000 users sign ups a day. That’s roughly 1 every minute or two. Not too bad. But what about the social media documents? Every tweet? Every page view you logged? Every catalog item visited? That can get pretty big. Each of these will be sent to you from the oplog, because each one is gets written into the oplog, regardless of if you need it or not. Extra work, extra load. Extra data you’re not interested in. Filtering though this is like putting a butterfly net over a firehose nozzle.

Change streams allow you to do this more efficiently. With change stream you get to customize several aspects of the stream that is returned to you:

  1. The specific collection you are interested in.
  2. The type of change you are interested in (inserts and updates only, for example).
  3. The specific parts of the changed document (if any) you want back.

These options give you great control over the source, size, and nature of the changes your listener app wants to handle. Rather than returning all writes to you and, and making you filter them out in application memory, the filtering is done at the server level. This reduces wire traffic, reduces your memory and CPU usage on the client. Further, it can save another round trip per document: if the mutation touched only one field - say, last login date - tailing the oplog would have only yielded you the content of the command mutation - the date value itself. If you needed the user’s email and name - which were not part of the command- they are not part of the oplog. Tailing the oplog would then not be enough, and you’d have to turn around and shoot another query (Joy! More I/O!) to get the extra details. With change streams, you get to include the extra fields in the returned event data by just configuring the stream to return them.

How to Consume Change Streams

Subscribing to change events depends on your particular driver support. Early beta had Node and Java driver support. I’ll focus here on Node.

There are 2 modes of consuming change streams: event driven, and aggregation pipeline. The aggregation pipeline way, is to just issue a $aggregate on a collection, with a mandatory new $changeStream pipeline operator as the first pipeline stage. You can introduce other pipeline stages after that stage, but it must be the first one. The resulting cursor would then return change items as the occur.

var coll = client.db('demo').collection('peeps');

var cursor = coll.aggregate([
{ $changeStream: {} }
]);
// .. now consume cursor as you would any

In the example above, we’re just saying that any write to the peeps collection in the demo database would be returned back in the cursor we opened. The cursor would remain open (baring errors or network issues or collection disappearance) so we can just process the events coming back sequentially.

Speaking of sequentially the event stream guarantees events returned would be in the order they were executed by MongoDB. The change stream system uses logical ordering that ensures you get the events in the same order mongo would have serialized them internally.

To include the full document affected, you can add the fullDocument option and a value of updateLookup. The other option is default which indicates you don’t need any extra data. Omitting the fullDocument option is equivalent to specifying the value default.

With the updateLookup value set, an event will include the queried value at some point after applying the operation that prompted this event. The subtlety here is that if there’s a high rate of change, your event may return a further future value of a document. For example, if you update a pageview.clickCount field twice at high rate, the event resulting from the first update may reflect the result of the second update. You will get 2 change notifications because 2 writes happened, and they will be reflected in order. But the lookup that brings in the current state of the document is not guaranteed to contain the first change because it is, in fact, a lookup performed after the event is queued for discovery by your change stream and not a point in time capture of the document.

var cursor = coll.aggregate([
{ $changeStream: { fullDocument: 'updateLookup' } }
]);

In the example above, the event returned from the cursor will have a field named fullDocument containing the document looked up at the server, without an additional round trip.

Speaking of event data, what else is returned?

{
"_id":{"clusterTime":{"ts":"..."},"uuid":"...","documentKey": {"_id":"..."}},
"operationType":"update",
"fullDocument":{"_id":"waldo","at":"2017-10-01","seen":"beach"}, // this is my document!
"ns":{ "db":"changeStreamDemo","coll":"peeps"},
"documentKey":{"_id":"waldo"},
"updateDescription":{
"updatedFields":{"at":"2017-10-17"},
"removedFields":[]
}
}

The change event includes a bunch of useful information:

  • An _id for the event. In case you wanted to stop and start again, save this one and ask only for changes that occurred since that id.
  • The operationType - discussed shortly.
  • The full namespace ns, including the database name and collection names.
  • documentKey pointing to the document _id subject of this event
  • fullDocument containing the document as it was just after write occurred. The word full may be a misnomer though: it depends on further projection you may add to retrieved a subset or a modified document. More about that in a bit. This field will not be present unless lookupDocument option was specified.
  • An update description, which contains the exact field value changes the values assigned in the updatedFields array, and the fields removed (think $unset) in the removedFields array.

Thus far, we just asked for any change. You can narrow down the change nature, using the various operation types during the stream setup. The options are:

  • insert
  • update
  • delete
  • replace
  • invalidate

The first 4 are self explanatory. invalidate occurs when a collection level change occurred which makes the document not available, other than delete. Think collection.drop().

To get notified only on a subset of the change types, you can request the change stream, and add a $match stage, like so:

var coll = client.db('demo').collection('peeps');

var cursor = coll.aggregate([
{ $changeStream: { fullDocument: 'updateLookup' } },
{ $match: { operationType: { $in: ['update', 'replace'] } } }
]);

Now only updates and document-replacements would be emitted back, filtered at the source.

This pipeline can also include transformations, so the aforementioned fullDocument field is really what you want to make of it.

var coll = client.db('demo').collection('peeps');

var cursor = coll.aggregate([
{ $changeStream: { fullDocument: 'updateLookup' } },
{ $match: { operationType: { $in: ['update', 'replace'] } } },
{ $project: {secret:0}}
]);

The code above will omit the secret field from the emitted event.

The $match stage can also apply other arbitrary conditions. When the updateLookup option is set, you can pretty much filter based on any document field or set of fields you want, using familiar aggregation syntax.

That was a quick rundown of consuming change streams using aggregation. But I actually like another option in the node driver: subscribing to change stream events as asynchronous events!

Here’s how that plays out:

// a filter describing the things i'm interested in
var filter = {
$match: {
$or: [{ operationType: 'update' },{ operationType: 'replace' }],
'fullDocument._id': 'waldo'
}
};

// the option to return the full document
var options = { fullDocument: 'updateLookup' };

// creating a change stream definition
var changeStream = coll.watch([filter], options);

// subscribing to events
changeStream.on('change', c => {
console.log('Waldo alert!', c)
});

changeStream.on('error', err => console.log('Oh snap!', err));

Using the code above, any update or replace to the document with _id ‘waldo’ in the collection coll will emit a change event.

My preference for this syntax is that it fits better into the modular async coding model. It also makes it easy to hook up the change function but define the handler elsewhere. This makes testing and reuse easy too. But that’s me - you do you.

Resume / Retry

In the face of network error, the driver to re-connect once automatically once. If it fails again, you can use the last _id of the change event (which will also be in the exception thrown), after you reconnect to your cluster. The responsibility for remembering where you were is on you (after the one-shot recovery the driver does for you). But both syntaxes allow you to add a resumeAfter option when requesting the stream, setting the value to the last change stream _id you successfully processed.

var lastProcessedChangeId = ...;

var options = { resumeAfter: lastProcessedChangeId, fullDocument: 'updateLookup' };

Due to the nature of large interconnected system, it is useful to design the change stream events in your application as ‘at least once’, and make any operation you trigger base on a notification idempotent. You should be able to run the same operation more than once with the same event data without adverse effect on your system.

Even when you limit the number, nature, and collection you listen to you may still end up with a large amount of changes to process. Or you may have subordinate systems that can’t handle your calls emanating from the events (think slow legacy systems). One thing you can do is deploy multiple listeners, each one taking on the same change definition, but also a partition filter on the change _id. A partition filter can be employed on any field actually, but the _id is present when you don’t ask for updateLookup too. The idea is to just run several listeners, each one with an extra field match on the modulus of the timestamp or something. If you need more capacity, you spin up more listeners and re-partition according to the number of listeners you need.

The change stream feature is currently in RC0 as of this writing, and should hit GA soon. I look forward to writing less code and incurring less I/O in the event processing component of our systems. It’s kind of nice to be able to use the same database infrastructure for all kinds of workloads, and this operational integration feature is a very welcome addition.

MongoDB - Don't be so (case) sensitive!

I have a collection of people, named peeps:

db.peeps.insert({UserName: 'BOB'})
db.peeps.insert({UserName: 'bob'})
db.peeps.insert({UserName: 'Bob'})
db.peeps.insert({UserName: 'Sally'})

And I want to be able to find the user named “Bob”. Except I don’t know if the user name is lower, upper or mixed case:

db.peeps.find({UserName:'bob'}).count() // 1 result
db.peeps.find({UserName:'BOB'}).count() // 1 result
db.peeps.find({UserName:'Bob'}).count() // 1 result

But I don’t really want to require my users to type the name the same case as was entered into the database…

db.peeps.find({UserName:/bob/i}).count() // 3 results

Me: Yey, Regex!!!

MongoDB: Ahem! Not so fast… Look at the query plan.

db.peeps.find({UserName:/bob/}).explain()
// ugg, collection scan:
// "winningPlan" : {
// "stage" : "COLLSCAN", ...

Me: Oh, I’ll create an index!


db.peeps.createIndex({UserName:1});
// query again...
db.peeps.find({UserName:/bob/}).explain()
// Ah! IXSCAN!
// "winningPlan" : {
// "stage" : "FETCH",
// "inputStage" : {
// "stage" : "IXSCAN", ...

// ignore case, still uses index
db.peeps.find({UserName:/bob/i}).explain()
// Ah! IXSCAN!
// "winningPlan" : {
// "stage" : "FETCH",
// "inputStage" : {
// "stage" : "IXSCAN", ...

Me: Yey!!!

MongoDB: Dude, dig deeper… and don’t forget to left-anchor your query.

// Run explain(true) to get full blown details:
db.peeps.find({UserName:/^bob/i}).explain(true)
// "executionStats" : {
// "executionSuccess" : true,
// "nReturned" : 3,
// "executionTimeMillis" : 0,
// "totalKeysExamined" : 4, // <<<=== Oy! Each key examined.
// "totalDocsExamined" : 3,

Me: Yey?

MongoDB: Each key in the index was examined! That’s not scalable… for a million documents, mongo will have to evaluate a million keys.

Me: But, but, but…

db.peeps.find({UserName:/^bob/}).explain(true)
//"executionStats" : {
// "executionSuccess" : true,
// "nReturned" : 1,
// "executionTimeMillis" : 0,
// "totalKeysExamined" : 1, // <<<=== Ok,
// "totalDocsExamined" : 1, // <<<=== Not Ok...

Me: This is back to exact match :-) Only one document returned. I want case insensitive match!

Old MongoDB: ¯\(ツ)… Normalize string case for that field, or add another field where you store a lowercase version just for this comparison, then do an exact match?

Me:

New MongoDB: Dude: Collation!

Me: Oh?

Me: (Googles MongoDB Collation frantically…)

Me: Ahh!

db.peeps.createIndex({UserName:-1}, { collation: { locale: 'en', strength: 2 } )

db.peeps.find({UserName:'bob'}).collation({locale:'en',strength:2}) // 3 results!

// "executionStats" : {
// "executionSuccess" : true,
// "nReturned" : 3,
// "executionTimeMillis" : 0,
// "totalKeysExamined" : 3, // <<<=== Good! Only matching keys examined
// "totalDocsExamined" : 3,

Me: Squee!

MongoDB: Indeed.


Collation is a very welcome addition to MongoDB.

You can set Collation on a whole collection, or use it in specific indexing strategies.

The main pain point it solves for me is the case-insensitive string match, which previously required either changing the schema just for that (ick!), or using regex (index supported, but not nearly as efficient as exact match).

Beyond case-sensitivity, collation also addresses character variants, diacritics, and sorting concerns. This is a very important addition to the engine, and critical for wide adoption in many languages.

Check out the docs: Collation

Notice

We use cookies to personalise content, to allow you to contact us, to provide social media features and to analyse our site usage. Information about your use of our site may be combined by our analytics partners with other information that you’ve provided to them or that they’ve collected from your use of their services. You consent to our cookies if you continue to use our website.